.................................. Return to Sumner's Home Page....
Return to N Scale RR Main Menu........... Return to Building UP's Canyon Division Menu
=========================================
...............Previous Page.............................Next Page If There Is One
=========================================
…..............................--- Sawmill Design/Build – Part 8 ---
=========================================
I could of skipped or just had a de-barker building but got carried away and started designing the interior of the building. This proved difficult with a lot of guess work. I worked off of some photos looking into the building from a distance and also used some videos that were taken with the de-barker in action.
Never did find pictures of some of this, just the edges of equipment so guess work was required as well as guesstimates of dimensions.
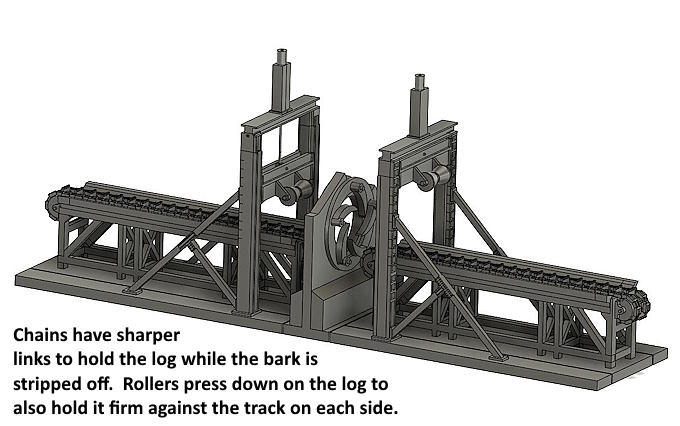
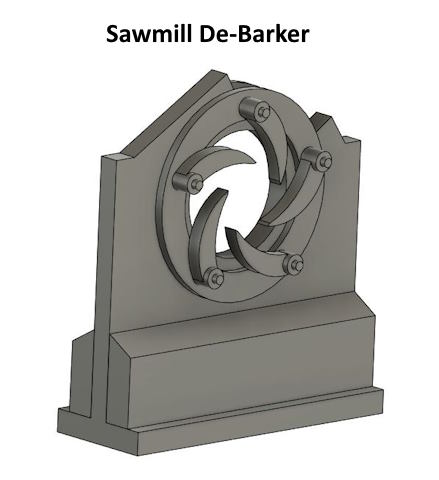
Main component and easiest to design was the actual part that strips the bark off.
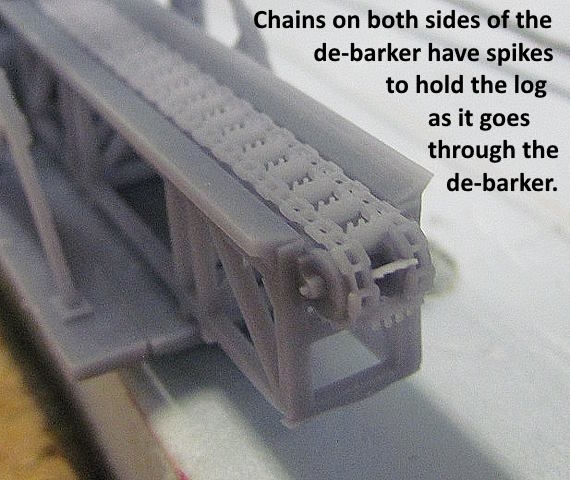
The chains/tracks above turned out to be a nightmare. Not so much how hard it was to design them but they slowed my computer, which normally isn't slow at all, way down. I'd make a change and have to wait 2-4 or 5 minutes at times for it to take effect. With the chain there are lots of faces and angles that I guess have to be kept track of and redrawn each time you do anything. Haven't had this big wait time for some time since getting a more powerful computer and graphics card. Last time was on really large brick walls and it wasn't as bad as this for some reason.
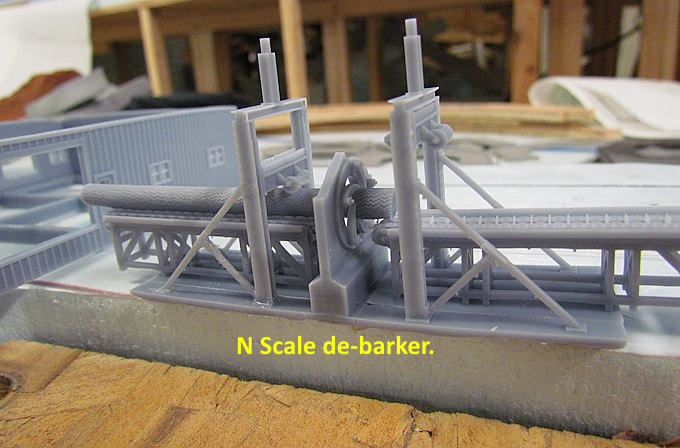
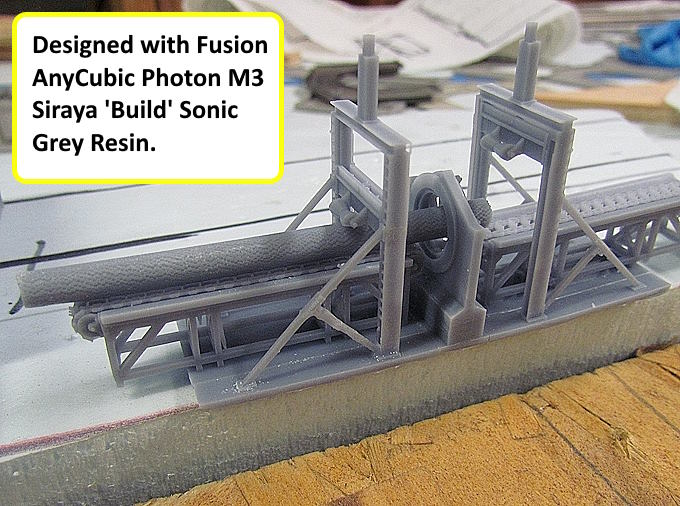
The gantries and the center stripping part didn't slow the computer down at all. All the parts above were designed separately pretty much and then combined. The print below was a single large print and was to check things. I'll separate them out and print them separately on the printers build plate after making a few changes.
.
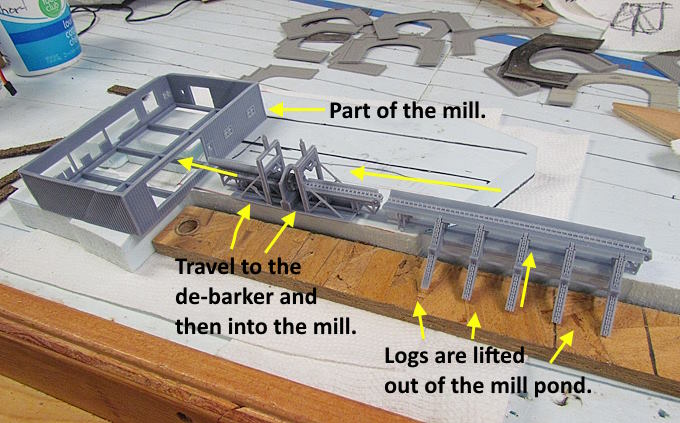
There will be a building that goes over the de-barker section but it will be removable. Still need to put a pulley on the left end of the section to the right that lifts the logs out of the mill pond and starts them on their way to the mill.
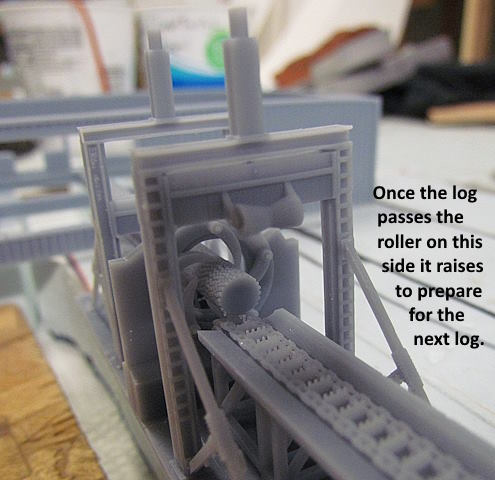
The rollers on the gantries press down on the log to hold it still while the center section strips the bark off as the log moves forward towards the mill. Once the log is clear of the roller on the right it raised so that the next log can enter. The same happens with the roller to the left. Once the log clears it will also lift clearing the way for the next log.
You can see videos of the de-barker in action and the mill operating ( HERE ).
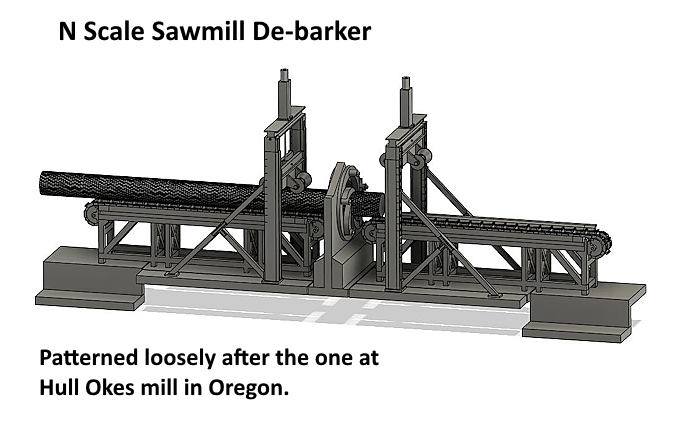
I figured out a way to 'kind of make' bark and have most of it taken down on the side exiting the de-barker and more on the side yet to be de-barked. Might mess with these a little more The log here is 3 foot in diameter (.225” / 5.7mm). I have logs that have all the bark on, most of the bark on and with the bark hardly showing. I'll work on these a little more and then make 2-3 other diameter logs in all three states.
The chain after the log lift is similar but without the small spikes that are on this chain. The dig into the log to also help hold it in place as it is being stripped. The little spikes are hard to see unless you are very close. They are .007”/ .177mm wide at the top and .015”/.381mm high.
The log above is about all stripped of its bark.
I've spent way too much time on this part of the mill.
To be continued............
A link to this whole build ( HERE ).
=========================================
...........................On..............e.........Next Page If There Is One